This is Part 3 of my Organic Gardening Series: Starting Seeds. The series of images below is a really fast and basic guide to seed starting if you’re already familiar with some of the details. For those that are very new to gardening, I’ve elaborated on each step in the process below. If you still have any questions, please comment here and I’ll get back to you!
Step 1: Gather Your Supplies
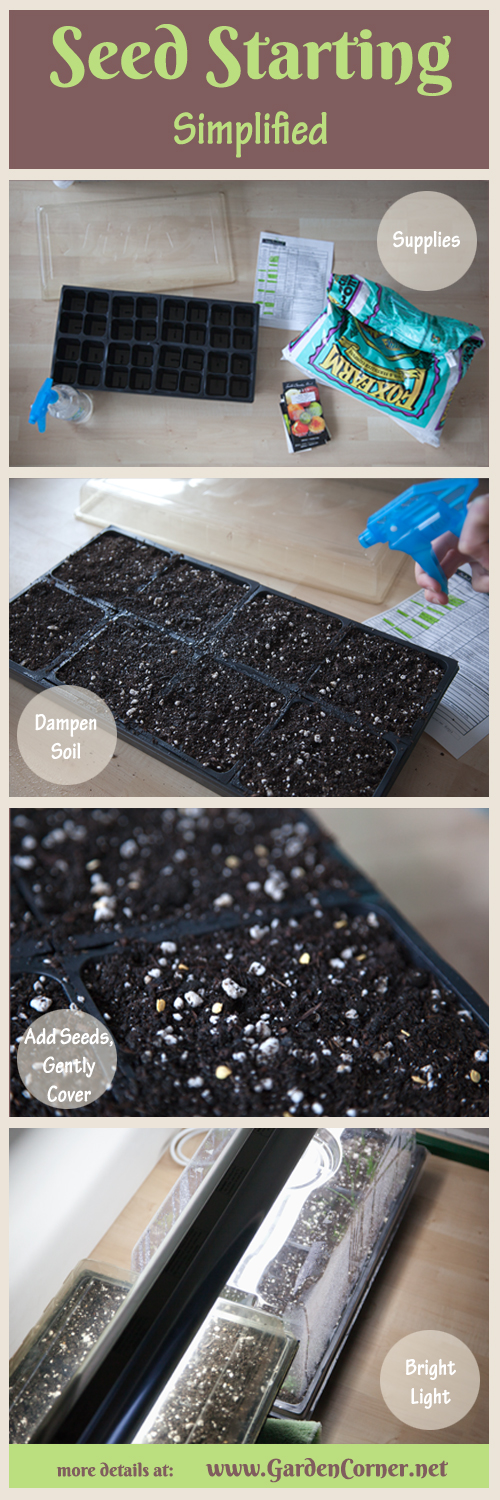
You will need the following:
-
Seed trays with plastic containers and clear lids
A spray bottle full of water
Seed starting soil (quality is important)
Paper and pencil
Grow lights
Step 2: The Dirt
Fill your containers with your soil, and spray it really well so the top layer is nice and damp. A good seed starting soil will be loose and fine, not dense. After they’ve sprouted, your seedlings will require a lot of nutrients to grow as quickly as they do. This is why I use Fox Farm soil; it’s fine enough for seeds to easily germinate in, but it also has the nutrients they need to grow big and strong! I also don’t have to worry about manually fertilizing the seedlings this way, which is much easier in my opinion! If you want more information about choosing a seed starting medium, check out my previous post: The Importance of Dirt.
Since I only sprayed the top of my soil, I add some water to the bottom of the tray so the soil can wick moisture up to the seeds as well.
Step 3: Planting the Seeds
I’m a lazy seed planter, I’ll admit. I don’t read the seed packets for every variety to see what their planting depth should be. I just sprinkle some seeds on the dirt, very lightly tamp it down, and then sprinkle a little more dirt over the top of the seeds. A good rule of thumb is to have your seeds at a depth that is approximately 3 times that of the seed’s diameter.
For really small seeds like Petunias or Snapdragons, I just sprinkle them on top of the soil, tamp it down lightly and call it good.
Step 4: The Lighting
Without at least 12-16 hours of bright light every day, your seedlings will get tall, stringy, and likely fall over after a few weeks. We want strong, sturdy little seedlings that will be healthy enough to withstand their eventual transition outdoors! For this reason, I recommend getting some good grow lights, and connecting them to a timer. If you’re on a budget, these are great bulbs. It’s best to keep the lights between 2-4 inches away from the tops of your seedlings.
Lastly: Ongoing Care
Once planted, water, light, and air are the three things your seedlings will need to thrive.
Water
If you watered your seed trays from the bottom as well as spraying the top, you probably won’t have to water much for the first week or two, since the seedlings won’t have any developed root systems yet. If the top of the soil looks dry, just give them a good misting.
Once sprouted, your seedlings will need a fairly steady supply of water. It’s just as important to make sure that they aren’t too wet, either. If you’re unsure of how much water to give your seedlings, I would recommend watering less. If you water too much, you risk mold, which means you could lose all of your seedlings. If you don’t give them enough water, you’ll likely notice their leaves getting a little wilted, and they should respond well to a good drink of water.
Light
As we discussed above, your seedlings will want at least 12-16 hours of light each day. They will also want a period of darkness to rest. This is why having your lights on a timer works so well. If you don’t have an automatic timer, just make sure to turn the lights off at night.
Air
Air circulation is important for two reasons. First, it is a preventive measure against mold and mildews. Second, it will help strengthen your seedlings so they will better be able to withstand outdoor winds when being transitioned outside. I like to put a fan near my seedlings once they’ve sprouted; it should be on the lowest power. If it still seems as though it’s creating too much of a breeze for your seedlings, then I just move it a little further away.
Finally, it’s important to note that a little attentiveness can go a long way when starting plants from seed. I check my seedlings every day, sometimes every two if I’m busy. It’s definitely more important to watch them closely when they’re just sprouting. Once they’ve grown a bit, then you don’t have to worry about them as much.
Well, that’s it folks. Thanks for reading! I hope all of you are enjoying nice spring weather! In the meantime, I’m wishing I could stay snuggled up at home right now.

PS – Stay tuned for Part 4, when I’ll talk about pruning and hardening off your seedlings!