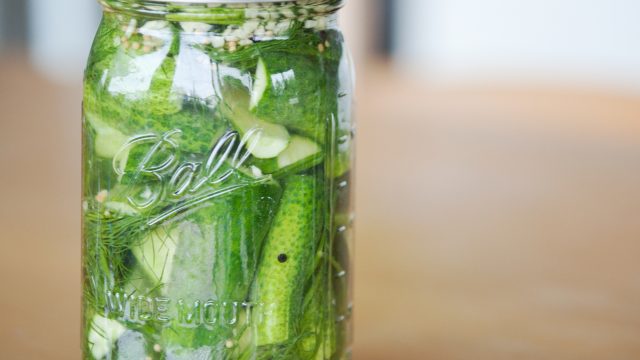
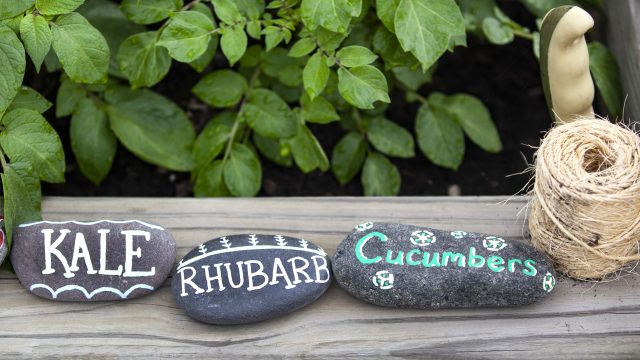
1. Weekend Warrior Edition – New Camera!

    May 11, 2012 by Jocelyn

    I’ve been a busy bee this month, and while I haven’t been posting much recently I have many projects in the works. So don’t fret! I have a LOT of good posts coming your way soon!

    In recent news, the most exciting thing I have to reveal is my new camera! I recently purchased a Canon 5D Mark II, and I’m having a ton of fun taking a crazy amount of photos. My weekend is already packed full of photo-shoot activities!

    Here are a few, just for fun:

    This one’s on Etsy
    Colorful Sewing Thread

    toes

    Vintage Fishing Rods

    Moonrise over Lake Superior

    Mason Jars all lined up

    I’ve been snapping so many photos, that I’m falling behind with PhotoShopping them. They’re all in RAW format, so I at least have to convert them. I’ve just been plugging away at it during the evenings, and hopefully you’ll start seeing more of my new images being listed in my Etsy Shop!

    In other news, I’m kind of a big deal. ;)

    I was on the news! I was a little nervous, but after watching it I’m happy that I came across as less awkward than I thought I would. As you can see, my community garden plot is a raised bed on top of a building, which is awesome for me since it’s within walking distance of my job. Here’s the video:

    Since our last average frost date here is May 31st, I have yet to actually plant anything in my garden. When I do, I promise you’ll all be the first to know! :) Have a fantastic weekend everyone!

    Share on TwitterSubmit to StumbleUponShare via email

  2. DIY Friday – How to Propagate African Violets

    April 6, 2012 by Jocelyn

    Propagating African Violets is easier than I initially thought.  As you may have seen, I’ve killed many of these pretty houseplants.  It wasn’t until recently that I seem to have gotten the hang of keeping them alive!

    Now that I seem to be able to keep the alive, the obvious next step is making as many of them as I possibly can, right? Here’s how to do it:

    Supplies:

      Scissors and/or a sharp knife
      A Small container (I use yogurt containers)
      Good seedling or seed starting mix (it should be very light, not dense)
      Plastic bag or clear container

    IMG_5049

    First thing you want to do is prep everything. Your planting container should be cleaned, then cut a small hole in the bottom of it. Be careful while doing this, of course!

    Cut a drainage hole in the bottom of your container

    Now, find a healthy looking leaf from an adult African Violet plant. Use a sharp knife to cut the stem of the leaf at a 45 degree angle. Make sure the cut is clean.

    Cut a healthy leaf at a 45 degree angle with a sharp knife

    Now stick it in your container with some good seedling mix, and give it a good drink of water.

    Stick it in some dirt and water

    African violets like to be in an environment where the air is holding a lot of humidity, and that’s where your plastic bag comes in. If need be, use scissors to cut it to fit the plant. I happened to luck out, and my bag fit pretty well without needing any cutting.

    Cover with a plastic bag or clear container to keep moisture in.

    Now the easy part is done; caring for the small plant as it grows is the difficult part. I’ve found that they do best if kept in a humid environment. Keep in mind, that they do not like to be sitting in water, so it’s better to allow the container to wick in moisture as needed. Once a smaller plant starts to grow, I usually move them into a larger terrarium type container. I put small rocks in the bottom of it and pour in some water; the container then goes on top, and a lid goes over the whole thing. Having a few holes for air circulation is also a good idea. Keep the small plants in an area with bright indirect light, and they should thrive.

    Baby plant!
    Soon you’ll have little African Violets like these!

    Share on TwitterSubmit to StumbleUponShare via email

  3. A Little Thursday Garden Link Love

    March 29, 2012 by Jocelyn

    I’m sitting here after a long day at work; I’ve got a glass of wine, Florence and the Machine on my playlist, and am browsing through my Garden Blogs folder in my Reader.  Life is good.  Although, considering it snowed here today, that may be the wine talking.  Oh well.  Either way, I’ve got some great link love for y’all.

    For all my fellow garden-loving folks,  check this out:

    Garden

    Willi over at DigginFood just posted some pics of the demo gardens for Sunset magazine.  This garden is looking pretty amazing, if you ask me.  They’ve got a these awesome orange trellises for peas and other climbers that I love.  The color is just perfect.

    I also found a new blog to follow, and her images are just so pretty!  Tricia’s blog, A Rosy Note, has some pretty lovely posts.  You see, Ranunculus are some of my favorite flowers, and looking at her most recent post, you can see how I was hooked! That, and her post about her grandpa brought tears to my eyes; she has a wonderful way of expressing herself in words that I can never seem to manage, and her post just struck a chord with me. Thank you, Tricia.

    A Rosy Note
    So pretty!

    And lastly, I found a great site called Sprout Robot. Just put in your zip code, and it gives you a calendar for when to plant all of your seeds! Cool, right? I know.

    www.sproutrobot.com

    And one last bonus link love image for you all! This one made me giggle:

    Hey Girl

    Happy Thursday everyone, and have a great Friday!

    Share on TwitterSubmit to StumbleUponShare via email

  4. DIY Friday (on Saturday). Paint Chip Art!

    March 24, 2012 by Jocelyn

    During my many hours spend surfing Pinterest, I came across a link for a great DIY project for creating paint chip art. Which doesn’t sound fancy, but end up looking like a pretty nice piece of framed art when on your walls. And seeing as it was nearly a free project, I had to try it. My results weren’t stellar, but I’m still pretty happy with my final piece of art.

    Now just so you know, I’m NOT very artistic. And it also turns out that I don’t have a lot of patience for tedious tasks.

    My DIY Paint Chip Art

    I am, however, a perfectionist, so those little spaces that you can see in between some of the triangles drove me bonkers. But after an hour of working on this, I had lost patience. I chalked it up to a test of my perfectionist tendencies, and decided that I would force myself to be okay with a little imprecision. I secretly saved my extra triangles, and intend on fixing it later.

    The full piece, completed.

    Anyway, here are the basic steps to having your own almost-free piece of art for your walls:
    Step 1: Go to your local home improvement shop and take a bunch of paint samples. If you like to plan ahead, you can check out Design Seeds and find a color palette ahead of time.
    Step 2: Cut your paint chips into equal sized triangles. Carefully. Otherwise you’ll be cursing yourself later.
    Step 3: I found that it was best for me to arrange them on the tabletop next to me, as it took me a little while to find an arrangement that I liked.
    Step 4: Get your backing, and some sticky stuff. I decided to use some sturdy photo backing board that I had laying around, and I’m glad I did. It kept things very sturdy the entire time I was working, so there were no accidental tears, bent papers, etc. I cut it to the size of my frame ahead of time. I also used some double sided scrapbook tape that I had, which worked really well. Carefully place your triangles onto your piece of paper/board in the pattern you previously made.
    Step 5: Trim the overhanging edges of your paint chips, and pop your completed project into a frame for instant fanciness!

    Paint chips

    Overall, it really was a simple project. I’ve decided that next time I should definitely have a triangle paper puncher, so as to avoid the annoyance of not being able to fit them together properly. Perfectionism aside, I think it looks pretty darn good!

    Share on TwitterSubmit to StumbleUponShare via email

  5. Meanwhile, in my Dream Garden…

    March 20, 2012 by Jocelyn

    I’ve been so incredibly busy lately, it’s ridiculous. I get home and just zone out once I’m done with my workout and other immediate chores. So here I sit at my computer, urging myself to get motivated to do some of my online work, but find myself getting sucked into Pinterest and Khan Academy’s new Exercise Dashboard. At least I’m using my brain at one of the sites, right?

    Anyways, I’ve got quite a large dream garden pinboard going right now, and I thought I’d share some of my favorites with you. These are all amazing garden spaces that I aspire to have some day. I’ve done a bit of extra leg work, so I can hopefully link directly to the source of the photos as well. The first is an absolutely amazing greenhouse that was posted by a Swedish blogger over at Isas Tradgard. Oh how I would love to have this greenhouse. *sigh*

    Beautiful Greenhouse

    And next, grapes. I really really want to grow my own grapes. Jams, wines, I would do all kinds of things with grapes! Don’t they look yummy?

    Grapes in Vineyard
    by Habub3 on Flickr

    Don’t worry, of course I won’t forget the flowers! Someday I hope to live in a house with gardens that are so full that they seem almost chaotic. I want flowers to be bursting from the seams of my yard; tumbling over fences and onto the sidewalk!

    Like so:

    Photo from HGTV.

    “Life's blows cannot break a person whose spirit is warmed at the fire of enthusiasm”  ~ Norman Vincent Peale
    by Abby Lanes on Flickr

    So much beauty can be found in gardens, I wonder how anyone can enjoy living without one! Mark my words, someday I will have a garden almost as lovely as these ones!

    Share on TwitterSubmit to StumbleUponShare via email